

Step-by-Step Guide
Open the plugin window (Tools > MetaHuman > MetaHuman Optimizer) and switch to the Auto Assembler tab.
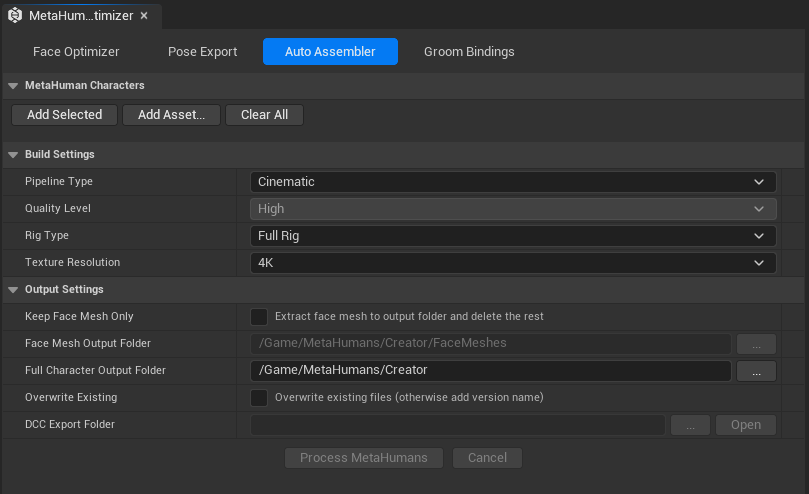
1. Add characters to the queue
Select one or more MetaHuman character assets in the Content Browser, then click Add Selected. You can also click Add Asset to browse with an asset picker.
Note
Select the MetaHumanCharacter assets, not the face mesh SKMs. In our template file they reside in /Game/MetaHumans/Creator and show the MetaHuman character icon in the Content Browser.
Characters are processed in list order. Use the X button on any row to remove one, or Clear All to start over.
2. Configure build settings
Set your pipeline type, quality level, rig type, and texture resolution. Each setting has a reset-to-default button on the right. For full details on what each option does, see the Settings Reference.
For the Face Optimizer and ARKit 52 workflow, the recommended combination is:
| Setting | Recommended value |
|---|---|
| Pipeline Type | Cinematic |
| Quality Level | (greyed out for Cinematic) |
| Rig Type | Joints Only |
| Texture Resolution | 4K |
See Preparing Your MetaHuman for the reasoning behind these choices and the triangle counts they produce.
3. Configure output settings
Enable Keep Mesh Only if you only need the face mesh (recommended for all face optimization workflows). Set the Face Mesh Folder to your preferred destination path.
If you need the full assembled character (body, textures, groom, BP etc.), disable Keep Mesh Only and set the Full Output Folder instead.
4. Click "Process MetaHumans"
The button label changes, a progress bar appears at the bottom of the tab, and a Cancel button becomes available. The assembler starts after a memory cleanup and a 5 sec warmup, giving you a chance to cancel.
Progress Bar and Status Messages
The progress bar shows combined progress across the whole queue. Each character in the list contributes an equal share, and within each character's share the bar advances at these milestones:
| Milestone | Progress within this character's share |
|---|---|
| Editor opened and initialized | 10% |
| Rig complete | 30% |
| Textures downloaded | 50% |
| Build and cleanup done | 100% |
The status bar below the progress bar describes the current phase:
| Status message | What is happening |
|---|---|
Opening CharacterName... |
Warming up: flushing memory and preparing to open the Character Editor |
Processing CharacterName |
Actively working: rig, texture download, or build in progress |
Completed N/M: CharacterName |
Character finished, preparing for the next one |
Batch complete: N succeeded, M failed |
All characters done |
There are short 5 sec non-blocking delays in between each step, to let some operations settle and fully initialize before moving to the next step. (warm-up, post-editor open, post-rig, post-texture, cleanup between characters).
Note
The editor will freeze when the MetaHuman Character Editor opens for each character (~17 seconds) and again during the assembly step. Both are inherent limitations of the MetaHuman SDK. Everything else, including the rig, texture download, and all the delay phases between steps, runs non-blocking and the editor stays responsive. (Although we still recommend not touching anything).
Cancelling
You can Cancel the queue halfway, but because some operations block the main thread and "freeze" the engine, the cancel button might not always be responsive. The behavior depends on which step is currently running:
| Current step | Can you cancel? |
|---|---|
| During the 5 sec delays | Cancel button works almost immediately |
| Rig or texture download (non-blocking) | Cancel button is clickable, but the current operation needs to complete before stopping the queue |
| Opening the editor or assembling (blocking) | Cancel button is unresponsive, you will have to click again during the next delay |
Output
When Keep Mesh Only is enabled, the face mesh is extracted to your Face Mesh Folder
When Keep Mesh Only is disabled, the full assembled character folder is placed in the Full Output Folder (or the MetaHuman Creator's default location if no folder is set).
After the batch completes, open any resulting face mesh in the Skeletal Mesh Editor to verify the LOD structure, triangle counts and texture quality. See Preparing Your MetaHuman for the expected triangle counts per quality level and pipeline.