

MetaHuman Assembly
Before running the Face Optimizer or the ARKit 52 exporter, your MetaHuman needs to be assembled first. The assembly settings you choose will determine the triangle count, LOD structure, and texture quality you'll have to work with down the line. Getting this right matters, especially before batch processing dozens of characters.
Every project has different needs: an RPG with cinematics and character dialogues has different requirements than a fast paced multiplayer shooter with 16 characters on screen. The recommended settings below strike a good balance between visual quality and performance, but do your own tests on a single character and validate runtime performance and quality before committing to a batch.
Geometry Levels
MetaHuman face meshes come in eight distinct geometry levels. Different pipelines expose different subsets of these levels, at different LOD indices: Cinematic LOD3 and High LOD1 are the same geometry, for example. To avoid confusion when comparing LOD numbers across pipelines, this wiki uses a Lv-A through Lv-H shorthand to refer to the actual geometry regardless of which pipeline produced it.
| Level | Polys | Cinematic | High | Medium | Low |
|---|---|---|---|---|---|
| Lv-A | 64,094 | LOD0 | - | - | - |
| Lv-B | 34,514 | LOD1 | LOD0 | - | - |
| Lv-C | 17,274 | LOD2 | - | - | - |
| Lv-D | 6,872 | LOD3 | LOD1 | LOD0 | - |
| Lv-E | 3,504 | LOD4 | - | - | - |
| Lv-F | 1,524 | LOD5 | LOD2 | LOD1 | LOD0 |
| Lv-G | 710 | LOD6 | - | - | - |
| Lv-H | 356 | LOD7 | LOD3 | LOD2 | LOD1 |
A dash means that geometry level is not available in that pipeline. The four Cinematic-exclusive levels (Lv-A, Lv-C, Lv-E, Lv-G) are the main reason to prefer Cinematic over the Optimized pipelines when assembling characters for the Face Optimizer.
Recommended Settings
We recommend assembling with the Cinematic pipeline for all face optimizer and ARKit workflows. It is the most flexible option: it exposes all eight geometry levels, has six distinct skin material quality tiers, and is the only pipeline where Lv-C is available. Any LOD can be extracted from the assembled asset later, so there is no cost to assembling with Cinematic even if you end up only using Lv-D.
The two geometry levels to recommend:
| Level | Cinematic LOD | Polys | Use case |
|---|---|---|---|
| Lv-D | LOD3 | 6,872 | Real-time game use. Good balance of quality and performance. The sweet spot for most projects. |
| Lv-C | LOD2 | 17,274 | Cinematics and close-up dialogue. Noticeably better mouth corner crease and cheek deformation than Lv-D. Only available in the Cinematic pipeline. |
Anything above Lv-C offers diminishing returns for most use cases. Anything below Lv-D starts to look noticeably degraded and is only suitable for background characters at a distance.

Assembly Process
Note
The following step by step covers the manual assembly process within the native MetaHuman Character window in UE5.6+.
For our automated batch tool see Auto Assembler
Step 1 - Configure Assembly
Go to the Assembly tab in the MetaHuman character and set the following:
- Pipeline: Cinematic
- Set the target root directory to
/Game/MetaHumans/Creator/ - Set the name to your character's name
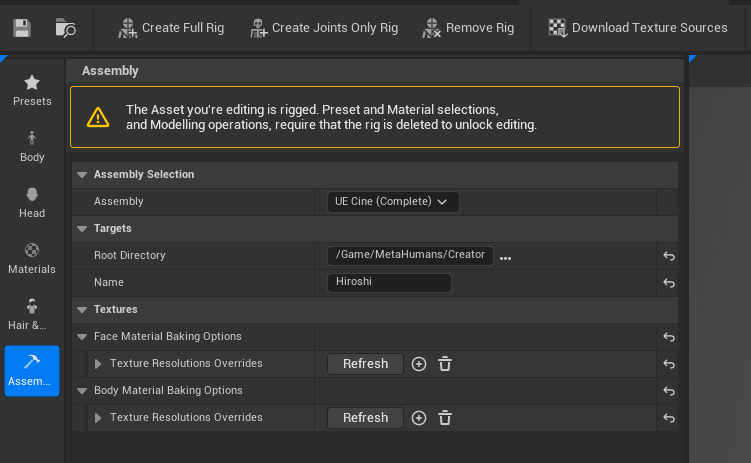
Step 2 - Rig
Click Create Full Rig in the top bar. This will usually take several minutes during which the engine will be unresponsive, although you should see a progress bar appear after a while.
Please note that once rigged, you won't be able to make any changes to your character's face or body, only hairs are available. To edit your character you will first need to click Remove Rig in the top bar. Then when you want to assemble, you will have to create the rig again.
Step 3 - Download Textures
Before clicking Assemble, download the textures for your character, which should take about 20 seconds. You only need to do this once, no need to download again for future assemblies, unless you want to change the texture quality. In the textures section:
- Click Refresh next to the face textures
- Click Refresh next to the body textures
- Click Download Texture Sources in the top bar
Tip
Oftentimes after downloading textures, the entire assembly UI panel disappears, which is most likely a UE bug. Simply switch to any other tab (avoid "Hair" which takes time to load) and switch back to the Assembly tab, the UI should reappear
Step 4 - Assemble
Click Assemble. The editor will be unresponsive for several minutes. See the Auto Assembler page for more detail on what happens during processing.
Step 5 - Check your export
After assembly, go to /MetaHumans/Creator/<CharacterName>/Face/ where you will find SKM_<CharacterName>_FaceMesh. Open it and check the different LODs and their vertex and triangle counts.
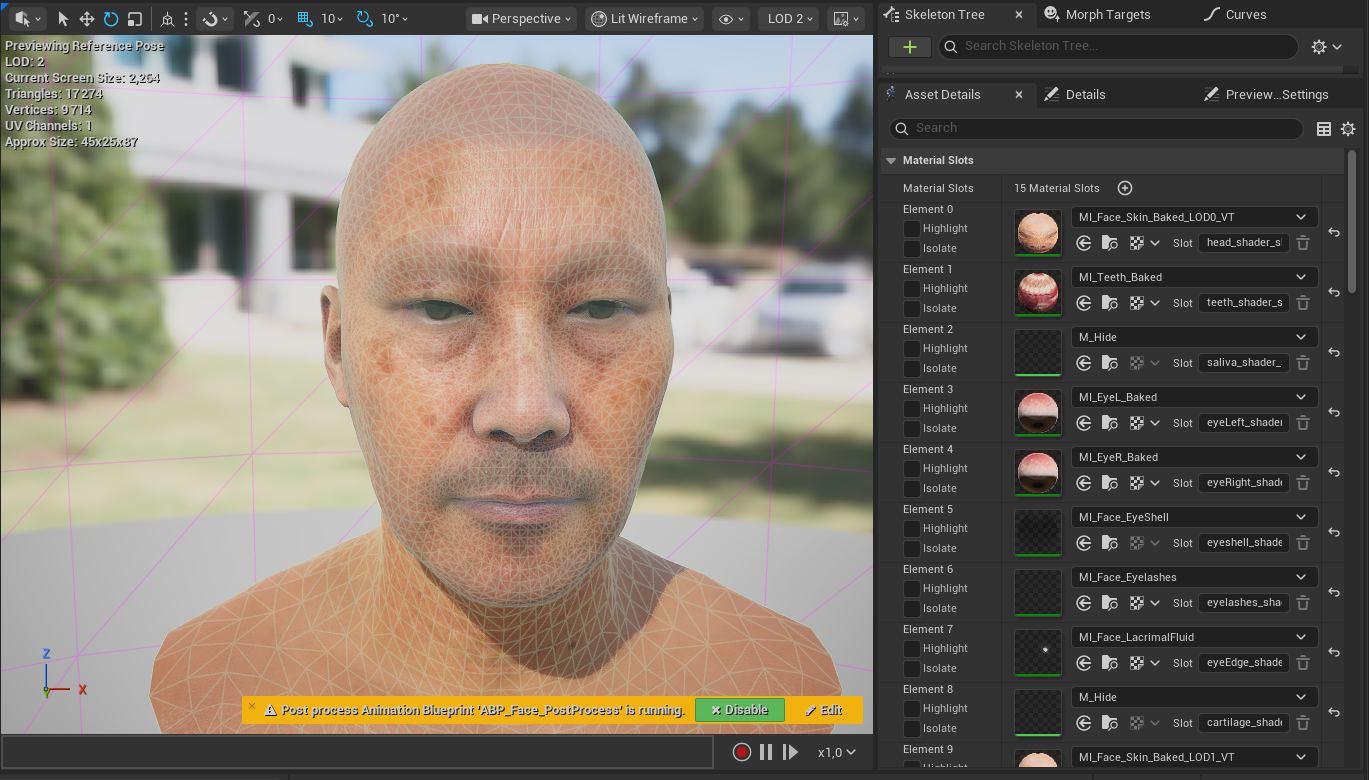
In the right panel you will also find the material slots with different LODs for the skin material. For a Cinematic assembly the key levels to verify are:
- Cinematic LOD3 (Lv-D, ~6.9K triangles): the sweet spot for real-time game use
- Cinematic LOD2 (Lv-C, ~17K triangles): recommended for cinematics and close-up dialogue
- LOD4 and below (Lv-E through Lv-H): only suitable for background characters at a distance